


Application Of Diy Indoor Slackline
Application Of Diy Indoor Slackline
The possibilities are endless when it comes to indoor slackline. You can use it to improve your balance, coordination, and core strength. You can also use it for a challenging workout or as a fun way to spend some time with friends.
Slacklines can help improve a person's balance and coordination, and they can be used both indoors and outdoors. Inexpensive and easy to set up, they're a handy choice for DIY beginners. Here are some suggestions on how to use slack rope in your training space:
1. Use it as a balance beam: Hold the elastic at waist height and practice walking along the line, keeping your body as straight as possible. You can also try lunges, side steps, and other moves that challenge your balance.
2. Create an obstacle course: Set up multiple slacklines at different heights and angles to create an indoor obstacle course. This is a great way to work on your agility and coordination.Add some cones or other objects that you have to maneuver around while walking on the slackline. This will help improve your agility and coordination.
3. Use it for strength training: Attach resistance bands or weights to the slackline to turn it into a makeshift pulley system. This is a great way to add some upper body exercises into your routine.If you attach a TRX or other suspension trainer to the slackline, you can use it for all sorts of bodyweight exercises like rows, tricep dips, and more.
There are endless possibilities for how you can use a slackline indoors – get creative and have fun!
-
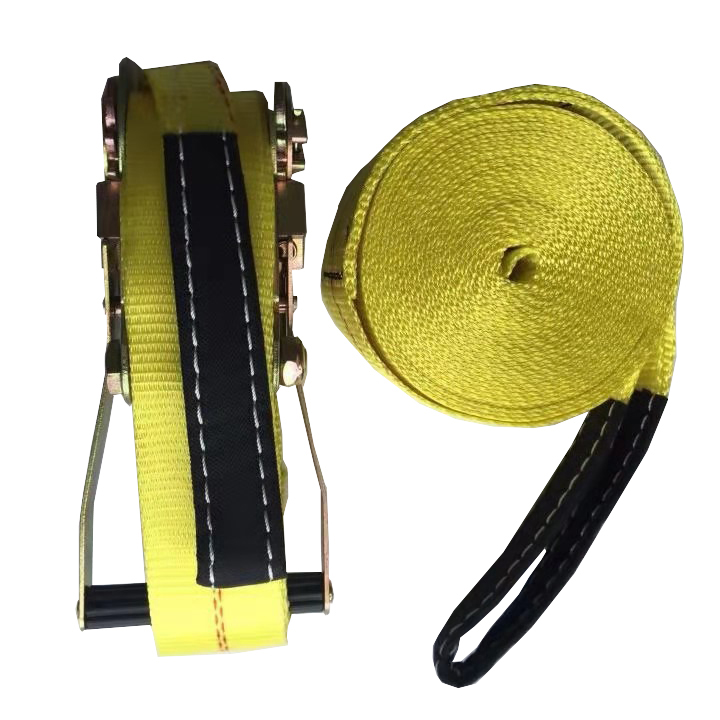
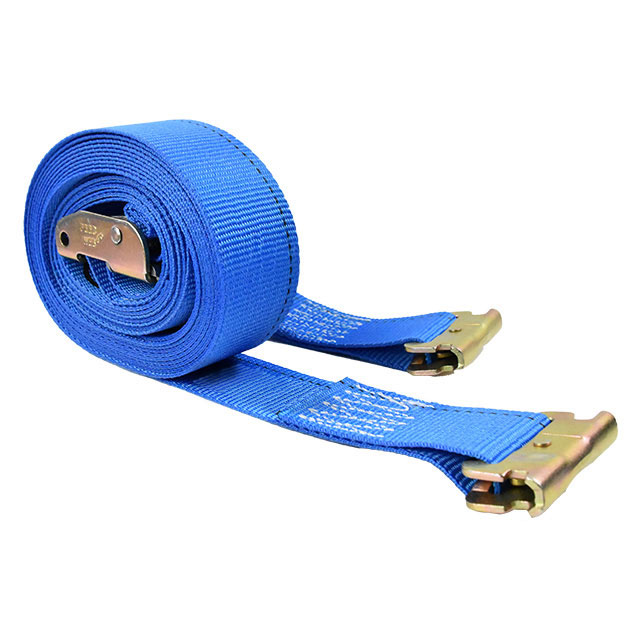
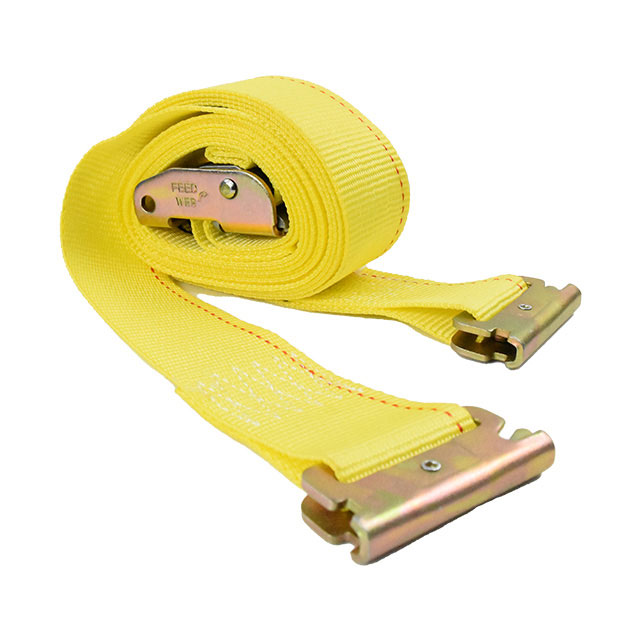
Capacity 3 Tons Color Yellow Size 50mm*10m Width 50mm/2 inch Length 8-10m/25-32 ft Material Polyester Keyword Extreme sports walking sling slackline 
-
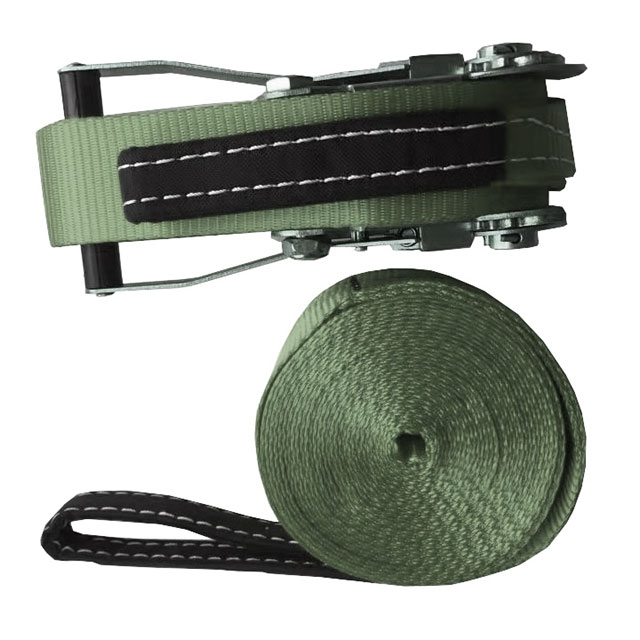
Capacity 3 Tons Color Green Size 50mm*10m Width 50mm/2 inch Length 8-10m/25-32 ft Material Polyester Keyword Extreme sports walking sling slackline Width 5cm Green Slackline 10M Kits, Custom Length And Logo
-
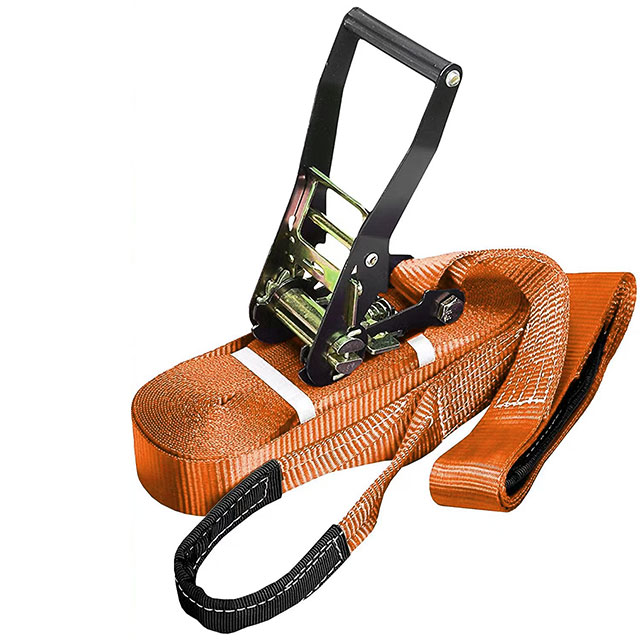
Capacity 3 Tons Color Red Size 50mm*10m Width 50mm/2 inch Length 8-10m/25-32 ft Material Polyester Keyword Extreme sports walking sling slackline Polyester Red Slackline Kit 8-10m 5cm for Backyard Extreme Sports Walking
-
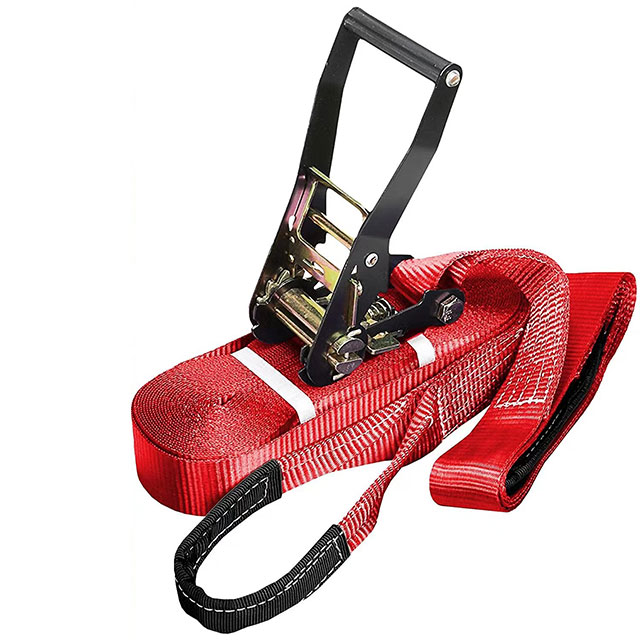
Capacity 3 Tons Color Red Size 50mm*10m Width 50mm/2 inch Length 10m/32 ft Material Polyester Keyword Extreme sports walking sling slackline 50mm/2 inch 10meter Slackline Outdoor Tree Protectors Slackline

-
What are the features of the DIY Indoor Slackline
The DIY Indoor Slackline is a great way to get your kids active indoors, and it’s also a great way to bond with them! Here are some of the features that make the DIY Indoor Slackline so great:
ADJUSTABLE: You can adjust the line to any length you want, so it's perfect for interior spaces of all sizes.
It has a padded handle: The padded handle makes it more comfortable for children to hold the rope and also helps prevent injuries.
EASY INSTALLATION AND REMOVAL: You can install the slack cord in minutes, and removal is just as easy.
Durable: The elastic band is made of high-quality material, which can withstand many uses.
The first and foremost feature of DIY Indoor Slackline is that it can be installed in your home without any professional help. It comes with all necessary hardware and installation instructions.
Another great feature of the DIY Indoor Slackline is that it is made of high-quality materials that can support up to 250 pounds. This makes it ideal for people of all sizes and weights.Lastly, the DIY Indoor Slackline is adjustable from 7.5 feet to 25 feet, so you can find the perfect length for your space.
The Slackline Kit is a complete system that has everything you need to get started with slacklining. The kit includes:
- A ratchet system with two carabiners.
- A 15 meter (50 ft) length of webbing.
- A tree protection set.
- A training line.
- A beginner's guide.
-
Advantages of DIY Indoor Slackline
The advantages of setting up a slackline indoors are many. Here are some key reasons to do it:
You can practice slackline any time of year, regardless of the weather.An indoor slackline is a great way to stay active when it’s too cold or wet to go outside.
You can set up an indoor slackline in any room with enough ceiling height.You don’t need much space to set up an indoor slackline – just enough to anchor the line at both ends.Indoor slacklines are portable, so you can take them with you when you travel.
There are plenty of reasons to love slackline, but did you know that you can also enjoy all the benefits of slacklining indoors? That’s right, with a few simple adjustments, you can set up your very own indoor slackline and enjoy all the advantages that come with it.
Here are just a few of the advantages of setting up an indoor slackline:
Even if you don't have access to an outdoor space to practice, you can choose to set up your slackline cord in any room in your home.
Indoor slacklines are easier to set up than outdoor slacklines, so you can start practicing right away. When practicing on slacklines indoors, you don't have to worry about elements such as wind or rain affecting your rope.
Indoor slacklines are much easier to set up than outdoor slacklines, so you can get started practicing right away.When you practice on an indoor slackline, you don’t have to worry about things like wind or rain affecting your line.

-
What are the materials for DIY Indoor Slackline
One of the most popular questions we get here at Urban Slacklines is what kind of materials do you need to make a DIY indoor slackline? And while it might seem like a simple question, there's actually a lot that goes into building a slackline setup that's safe and fun to use.
In this blog post, we'll break down all the materials you'll need to make your own indoor slackline, including the type of slackline webbing, anchors, and more. We'll also give you some tips on how to set up your slackline so you can get started slacking ASAP.
If you’re looking for a fun and challenging project to take on, consider setting up your own indoor slackline. Slacklines are a great way to improve your balance and coordination, and they can be set up almost anywhere – including inside your home.
To get started, all you’ll need is:
A length of slackline webbing (available at most outdoor stores).
Two anchor points (heavy furniture or doorframes work well).
Once you have all of your materials, setting up your indoor slackline is a relatively simple process. Just follow these steps:
1. Attach one end of the webbing to one of your anchor points. Make sure the webbing is tight and secure before moving on.
2. Run the webbing across the room to your second anchor point. again, make sure it’s tight and secure before continuing.
3. Attach your ratchet system or tensioning device to the webbing and begin tightening it until the slackline is taunt. You may need to experiment
If you're looking for a fun and challenging activity to do indoors, consider DIY indoor slacklining! All you need is a few simple materials and you can set up your own slackline in the comfort of your own home.
-
Mastering the Basics of Indoor Slackline
Slacklining is a fun and unique sport that can be enjoyed by people of all ages! Whether you're an experienced slackliner or just starting out, mastering the basics of indoor slackline is a great way to gain confidence in your abilities. Indoor slacklining offers the challenge of balancing on a thin line while giving the opportunity to practice under controlled conditions. With the right setup and a few tips, anyone can learn how to safely and confidently use an indoor slackline.
Benefits of Slacklining Indoors
Full Body Workout: Slacklining indoors provides a low impact, full body workout that will tone muscles and increase coordination. It works the core, arms, legs, and back as youbalance on the line. It also helps with coordination and focus by improving your sense of balance.
Improves Posture: Slacklining indoors encourages proper posture while you balance on the slackline. This improved posture translates to better posture when standing and sitting in everyday life, which can help reduce aches and pains over time.
Mental Clarity: Balancing on a slackline requires focus and concentration. This activity helps to clear your mind of distracting thoughts and worries while you remain in the present moment. When done regularly, it can help improve emotional well-being too!
Stress Reliever: Slacklining indoors is a great way to release stress from work or school as you concentrate solely on your balance. The physical act of balancing helps to activate endorphins that can make you feel relaxed and happier overall.
Fun Activity: Slacking indoors is a fun activity for all ages! Whether alone or with friends, slacking can be an enjoyable activity that gets everyone out of their comfort zone while still being safe enough to do at home or indoors.
Buy the DIY Indoor Slackline Method
The DIY Indoor Slackline Method is the most comprehensive indoor slacklining guide available, period. It provides step-by-step instructions, photos and illustrations, for building an indoor slackline setup that is safe, fun, and will last for years.
The indoor slackline is a great way to have fun and stay in shape during the winter months. By following the instructions in this guide, you can easily set up your own indoor slackline in your home.
What You'll Need:
-A length of flat webbing, at least 2 inches wide (this can be purchased at most hardware stores).
-Two anchor points, such as posts or doorframes, that are sturdy and at least 6 feet apart.
-A ratchet strap (optional).
Instructions:
1. Choose two anchor points that are sturdy and at least 6 feet apart. Doorframes or posts work well. If using doorframes, make sure they are not loose in their frames. If using posts, drive them into the ground so they are secure.
2. Wrap the webbing around one of the anchor points and thread it through itself to form a loop. This loop will be where you stand when slacklining.
3. Take the other end of the webbing and wrap it around the second anchor point.
The guide includes detailed instructions and photos for each step, so you can be confident that your slackline is set up correctly. It also includes tips for getting the most out of your slackline practice, so you can start improving your balance and coordination right away.
About diy slackline
DIY slackline refers to the process of making a slackline by oneself using materials such as webbing, ratchets, pulleys, carabiners, and cordlocks. Slacklining is a sport that involves walking or balancing on a suspended webbing that is tensioned between two anchor points. Making a DIY slackline can be an affordable and enjoyable way to get involved in this sport.
To make a DIY slackline, one needs to measure the length of the webbing, cut it to size, and attach the anchor points using ratchets, pulleys, or other tensioning devices. It is important to ensure that the slackline is securely anchored and properly tensioned before attempting to use it. Beginners are recommended to use a short and low slackline and to have a spotter or experienced slackliner present.
Diy Slackline Stand
How do you make a homemade slackline?
Slacklining is an increasingly popular sport that can be done for fun and fitness. It is a great way to challenge yourself and practice balance, coordination, and core strength. If you want to get started with slacklining but don’t want to invest in an expensive kit, making your own homemade slackline is a great option.
How do you anchor a slackline without trees?
Slacklining is a popular activity for those looking to relax, stay active, or just have some fun outdoors. It can be done almost anywhere, but it is often difficult to find suitable trees or other structures for anchoring the slackline. In this article, we will discuss the various ways you can anchor a slackline without trees. We will look at what materials and tools you need, how much time and effort it requires, and any other considerations when choosing an anchoring system.